Step-by-Step Guide: Installing Barrier Bags for Maximum Efficiency

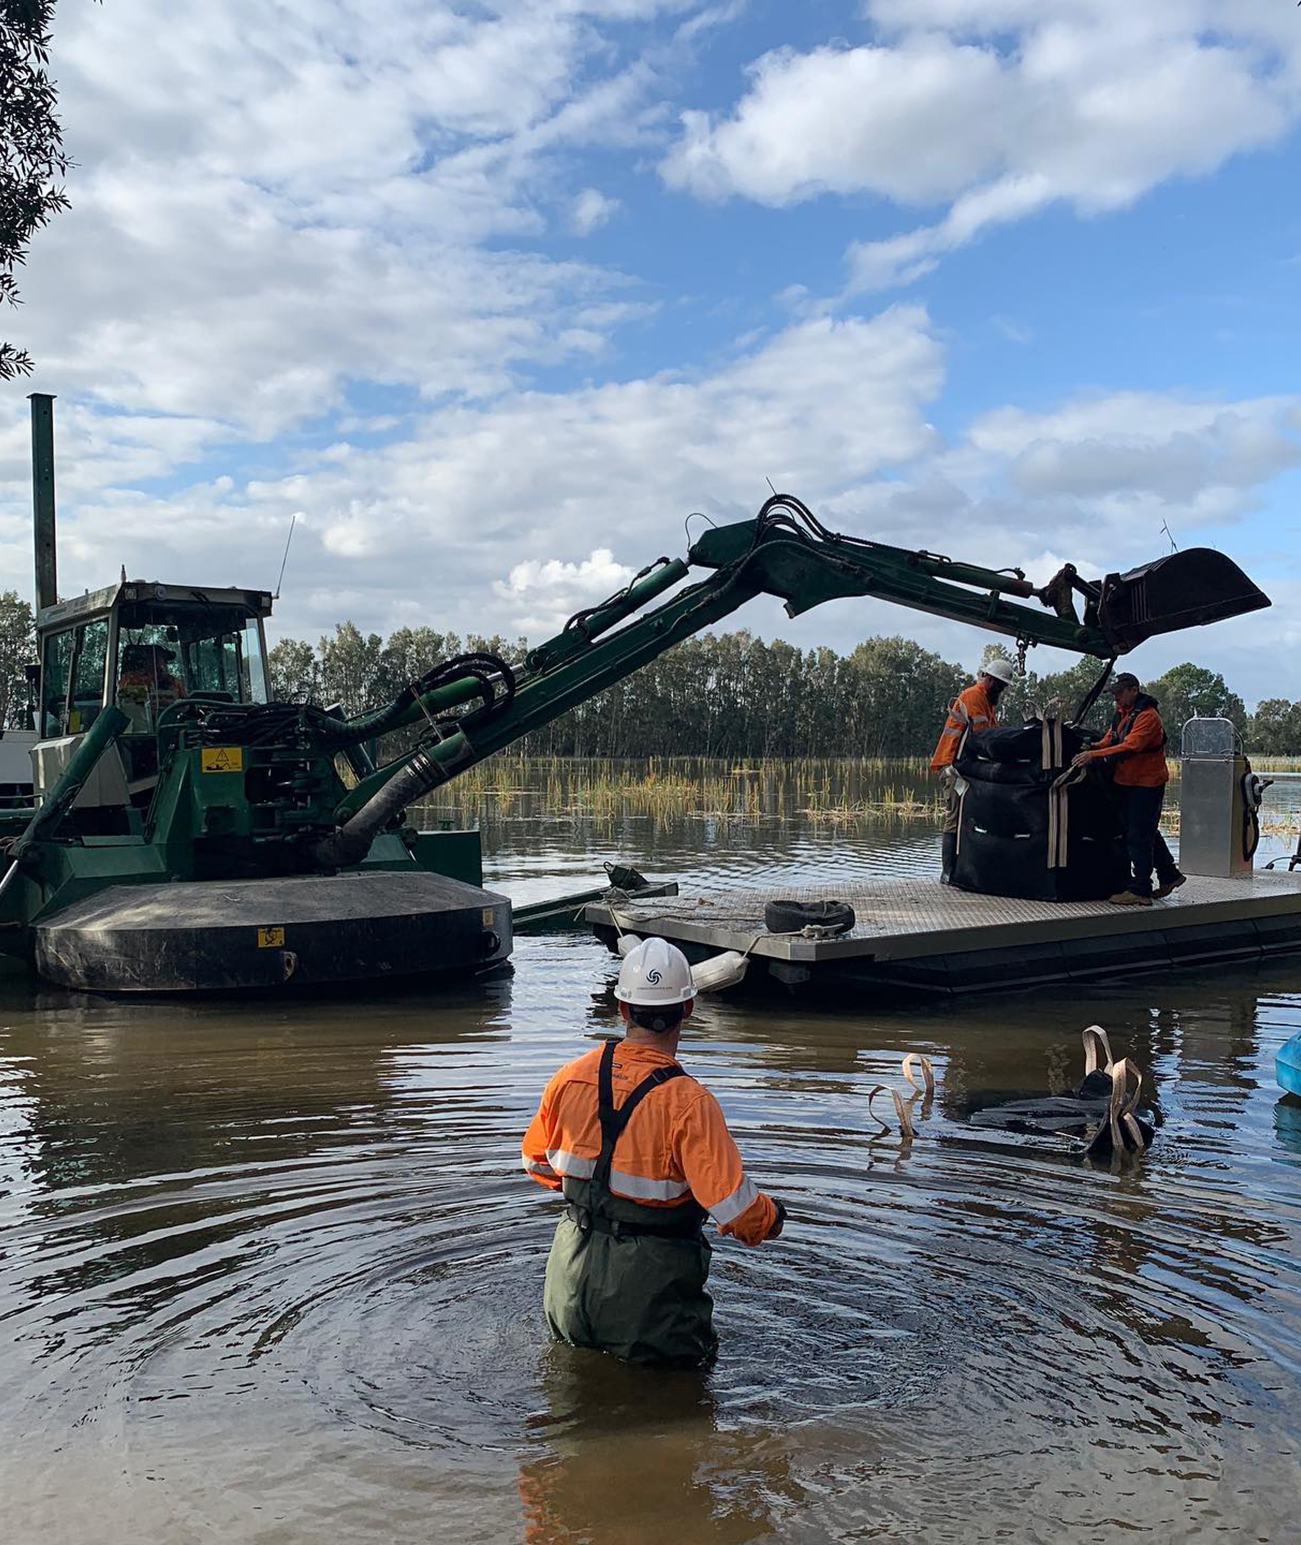
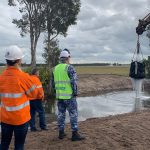
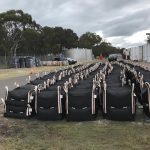
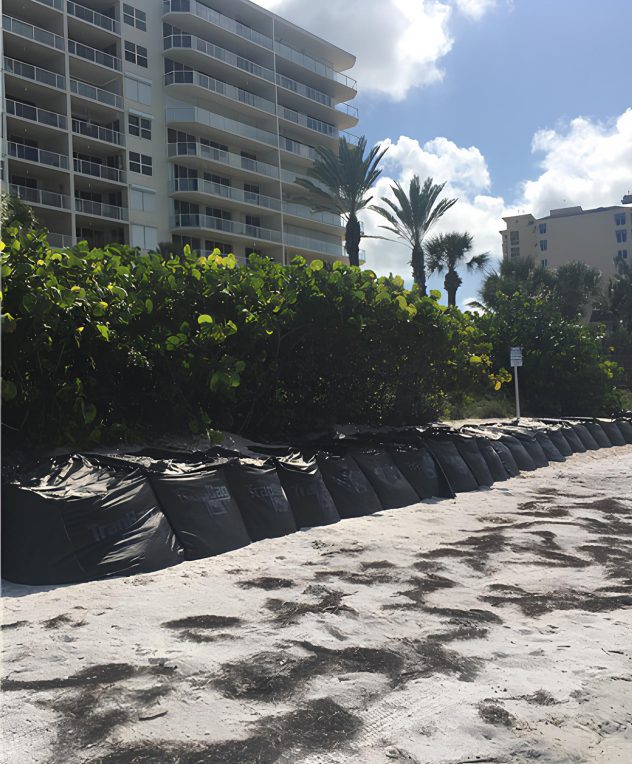
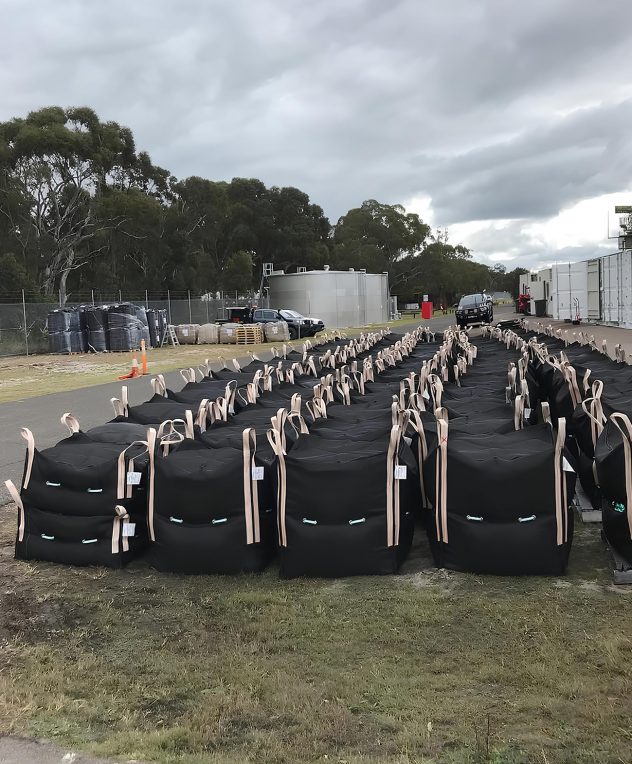
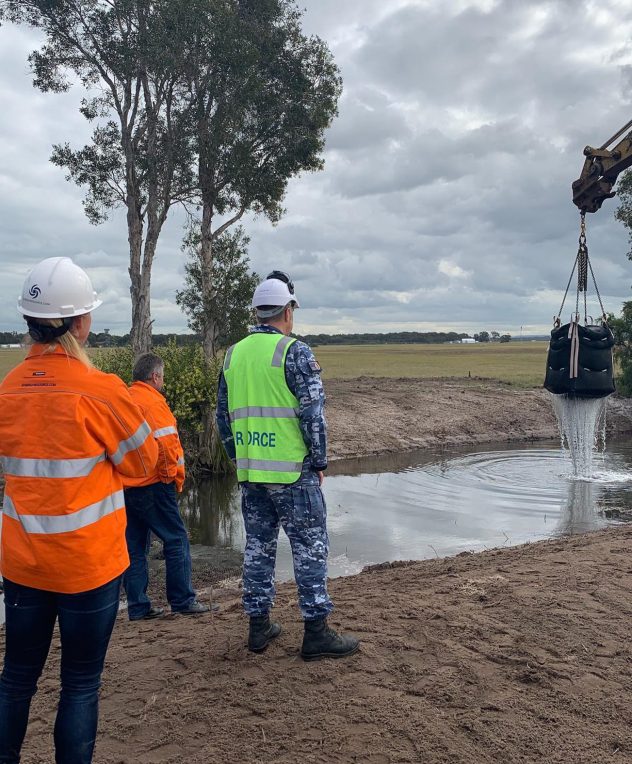
Barrier Bags are designed for easy and efficient installation, making them a preferred choice for erosion control, soil stabilization, and environmental protection. Whether for slopes, retaining walls, or coastal reinforcement, here’s a step-by-step guide to ensure maximum efficiency during installation.
Step 1: Site Assessment
Before starting, assess the project site to understand the terrain, erosion risks, and structural requirements. This will help in determining the number, size, and layout of Barrier Bags needed.

Tips:
  • Identify areas prone to erosion or sedimentation.
  • Map out the placement for optimal coverage and protection.
Step 2: Preparing the Area

Prepare the installation site by clearing debris, leveling uneven surfaces, and marking the layout. Minimal excavation is needed, as Barrier Bags adapt to the existing contours of the land.

Benefits:

  • Saves time and reduces preparation costs.
  • Minimizes disturbance to natural landscapes.
Step 3: Filling Barrier Bags

Fill Barrier Bags with the appropriate materials (e.g., soil, sand, or aggregates) based on project requirements. This can be done on-site or prefilled and transported for immediate use.

Tips:

  • Use uniform filling to ensure stability.
  • Follow specific material recommendations for the intended application.
Step 4: Placing and Aligning

Place the filled Barrier Bags in the designated areas according to the project design. Interlocking plates can be used for added stability and alignment, especially in steep or vertical structures.

Key Considerations:

  • Ensure proper alignment for structural integrity.
  • Allow for eco-pockets to support vegetation growth.
Step 5: Securing the Structure

For reinforced applications, such as retaining walls or steep slopes, use geogrid connections to secure Barrier Bags. This adds additional stability and strength to the structure.

Why It Matters:

  • Prevents displacement under pressure or heavy loads.
  • Enhances durability in harsh environmental conditions.
Step 6: Inspect and Finalize

Conduct a thorough inspection of the installed Barrier Bags to ensure proper placement and alignment. Make any necessary adjustments to optimize performance.

Final Touch:

  • Add vegetation or hydroseeding for eco-friendly projects.
  • Monitor for water flow and erosion resistance.
Why Choose Barrier Bags for Easy Installation?
  1. Quick Setup: Simplifies preparation and placement for faster deployment.
  2. Flexible Design: Adapts to uneven terrains and tight spaces.
  3. Eco-Friendly: Promotes vegetation growth for long-term erosion control.
  4. Cost-Effective: Simplifies installation and reduces labor costs.
Conclusion
Barrier Bags offer a simple, efficient, and eco-friendly installation process, making them a versatile solution for erosion control and soil stabilization. By following these steps, you can ensure maximum efficiency and long-term project success.
Contact us today to learn more about Barrier Bags and how to integrate them into your next project!

Leave a Reply

Your email address will not be published. Required fields are marked *